Add New Resources
Step 1
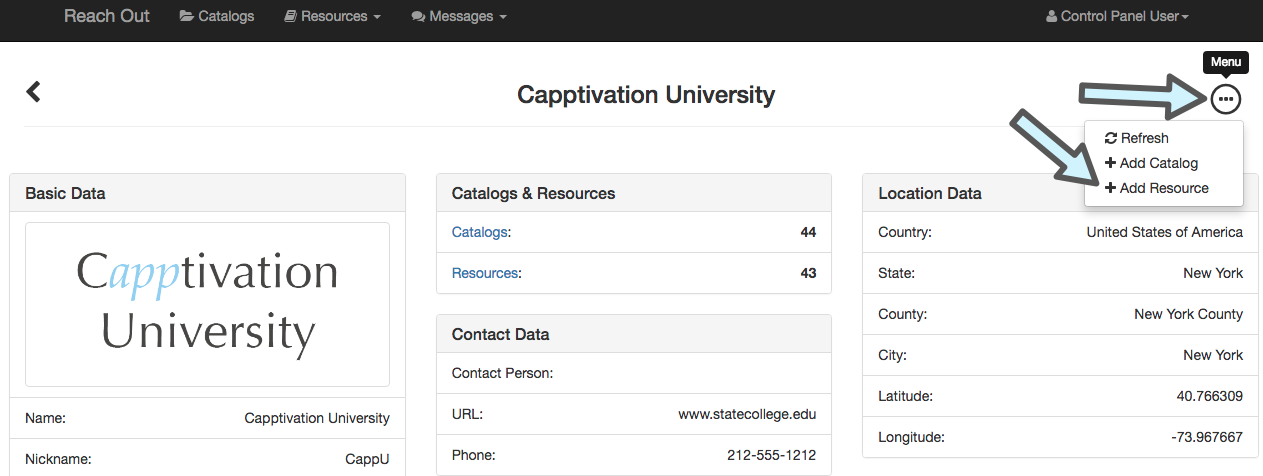
To Create a new resource the first step is to click on the home screen menu (circle with ellipsis) and select "Add Resource"
Step 2
After clicking on "Add Resource" you will be taken to a new screen where you will need to fill out the corresponding fields to create the new resource. **Important**
- Make sure to click "Publish". The switch should turn green
- A "Resource Icon" does not need to be applied unless you plan to add that resource as a button on the Reach Out App home screen
- You do not need to select a campus scope
- "Resource Attributes" refer to the small icons that show up under each contact
- "Tags" refer to the short phrases under each contact intended to give a preview of the services offered

After filling out all of the fields, click "Create" (See image below for what a fully filled out resource looks like). You will then need to add the resource to the different Catalogs within the app where you'd like it to appear. For instructions on how to do that click here.
